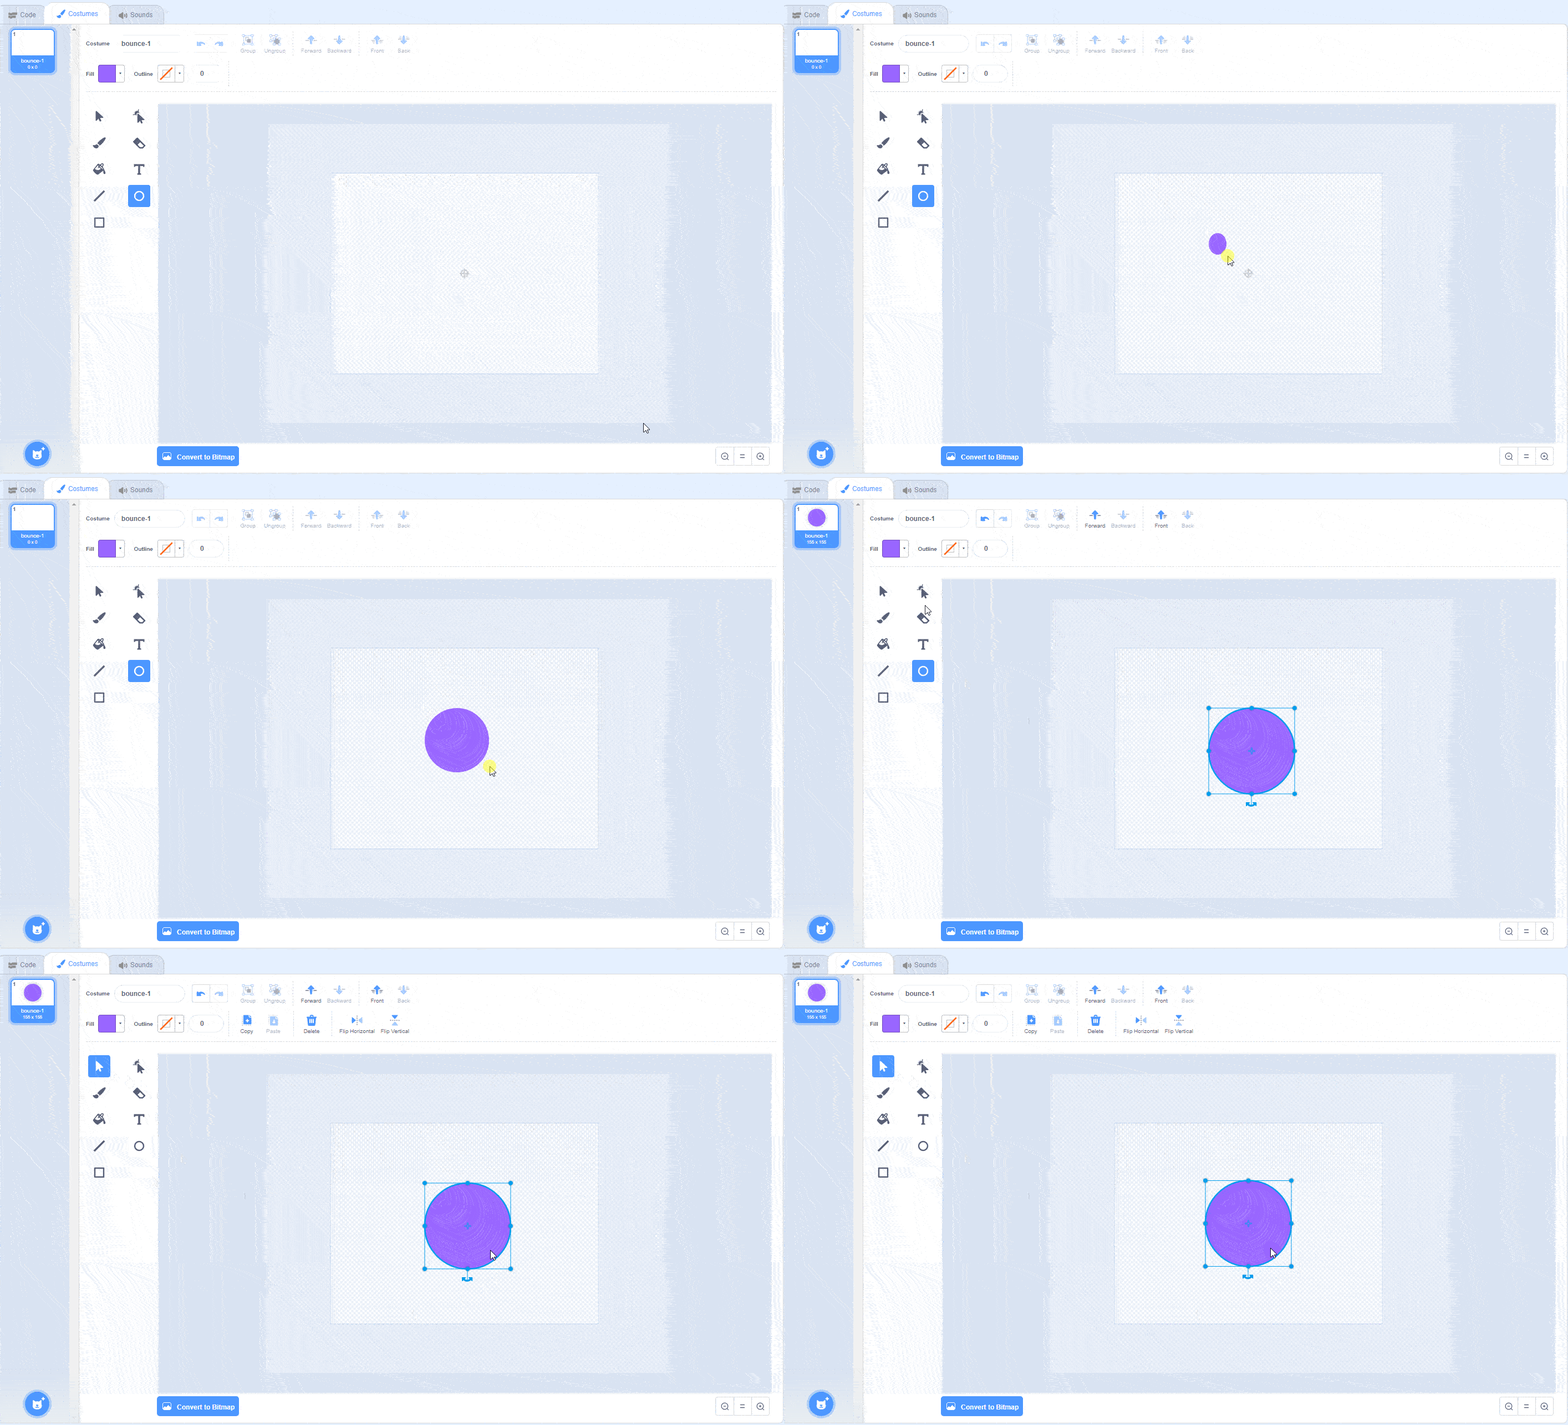
To create a bouncing ball in Scratch, we are going to create a custom sprite that has 5 costumes.
As a reminder for your young coder, a Scratch sprite is any image kids can create and program in the Scratch interface.
And then, a costume in Scratch is a unique drawing or pose of a sprite. So, you can add multiple costumes to any sprite and give the sprite a different look or pose when it turns a certain direction (say, left or right), etc.
1. Hover over “Choose a Sprite” and click “Paint.”
2. Name the costume “bounce-1.”
3. Draw a medium-sized circle with a dark color and no outline.
4. Select the circle and line it up with the center of the canvas.

Tip: If your child isn't sure how to center an object on the canvas, when you move your circle around with the Select tool, you'll see a black crosshair that marks the exact center of your canvas.
Have them drag their circle toward the crosshair, and when the selection's center lines up with the crosshair, then the circle will be exactly at the center of the canvas.
5. Right-click the costume and duplicate it 4 times until there are costumes named "bounce-1" through "bounce-5."
6. With the Select tool, click and drag on the sides of the circles to make them “squash” and “stretch.” Look at the images below for examples.
These costumes will mimic the look of a ball as it bounces up and down, and "squashes" as it makes impact with the ground.

To test the costumes, create a code for the bouncing animation:
1. Add a when <flag> clicked block to the sprite’s code area.
2. Attach a switch costume to bounce-1 and a go to x,y block to the code.
3. Add a when this sprite clicked block to the code area.
4. Attach a repeat block with a value of 5.
5. Inside the repeat, add wait with a value of .05 seconds and a next costume block.

You can always adjust costumes to make the bounce look smoother, or change the wait value to change the timing.
How's it look? Want to keep learning? See how this newly-created bouncing ball can be put to the test when creating a game in Scratch.
